Thursday, December 18, 2014

Hammer & Nail (Animation)

The Silver Hammer!


     This project was one of the trickiest projects, just because the hammer wasn't just using plain old shapes but it involved a lot of extruding and changing the object into vertex mode to move every little dot and adjust the different shapes. A new tool we learned with this project was a type of extruding that is somewhat helpful.


Process of creating hammer:


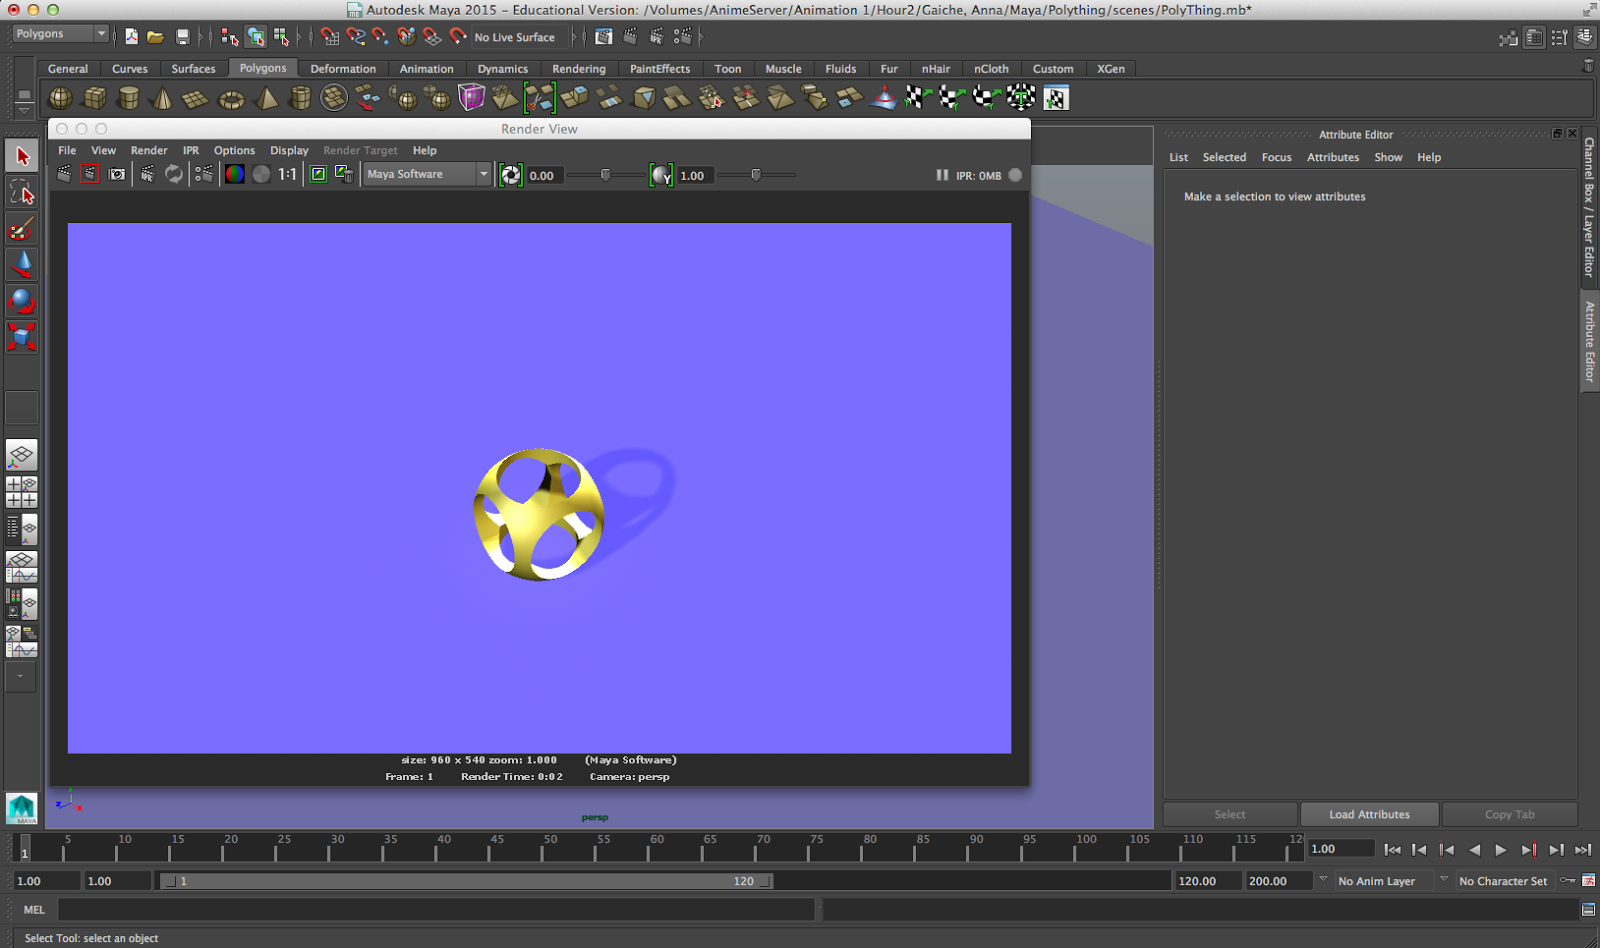
Screenshot of  hammer rending in the Maya application.
     In order to create this hammer, I used some simple shapes but the hardest part of it was transforming the shape to get what you wanted. First I started out with a simple long rectangular prism which was used for the handle, I then combined lots of cubes for the top of the hammer and used the scale tool to stretch out the cube which made one side wider than the other. On the other end of the hammer, you have to use bevel and extrude/split the hammers end which formed a horn shape like antlers. You then changed the object into vertex mode and very carefully curved the so called antlers downward. This then formed the end of the hammer. You could add curves to the handle of the hammer using the bevel tool and selecting which parts of the handle you wanted to curve inward and outward. I then created a nail using a cone for the point, and two cylinders. I lastly added textures to the hammer and nail and platform to give it a outside type of feel.

     As always, I added directional lighting to add shadows to the hammer and nail and to light it up. Then I rendered out the image which showed what the lighting looked like when it was finished rendering.

What I learned:


*Learned how to use the bevel tool more efficiently

*Learned how to create curves in objects using extrude and bevel

*Learned how to add better lighting to objects

Extra screenshots:


The Poly Thing! (Animation)

PolyThing


     The goal of this project was to create a poly thing. What's a poly thing? You may ask, well I'm not quite sure either. But I will most definitely describe what was need to create it.


Process for making the Poly Thing:  

    
      This project showed us how to use the difference option in the Booleans settings. It also used a lot of lighting as well. First I started off with a simple sphere, I then created three cylinders and aligned them in the center of the sphere. After that, I went to the different Booleans and selected difference and it created a sphere with six holes in it. When this object was created, I simply added a gold texture to it with a phong material to add a reflection and shine to the objects. Then I added a plane with a brighter color to make the object stick out when it is rendered out.
      
     Lastly, I added directional light around and inside the object to add shadows and light to the inside of the object so its not so dark inside.

What I learned:

 
     The main concept of creating this project was to introduce any animator to the lighting and differencing objects stage. These two concepts are very important when it comes to animation.

Extra screenshots:


Ice Cream YUM! (Animation)

Ice Cream Creation!


          This project made me a hungry animator. Our goal for this project was to make a simple ice cream scene with all the components of ice cream. For this project we used the application Maya and the simple polygons but we got to use some new tools in Maya as well, including bump mapping, and a new way of adding textures.

Process of making Ice Cream:

    
     I was given directions to create this lovely scene. This creation was pretty simple but required focus. First, I placed down two planes, one to act as the wall and the other to act as the floor. I then used simple shapes such as rectangular prisms and cubes to create the table where the ice cream sits. I then gathered 5 spheres and added a ice cream color to each of them (Strawberry, chocolate, and vanilla) then used bump mapping to create a bumpy texture on the spheres. I then created a bowl by using a cylinder and creating a smaller cylinder to difference them so it created a opening in the cylinder to make it a bowl of some sort. I fit 3 spheres in that one bowl. I then created a cone with the cone shape. With two round circular rings and 3 cylinders, I was able to create a stand for the ice cream cone. I fit two spheres on top of each other into the waffle cone. I added a cherry on top for extra decoration. The scooper was made by differencing 2 spheres and combining a cylinder to the end of the scoop. At the end of the handle, you add a sphere to finish it off.


     Those weren't the last steps of the creation though. I then had to add the textures to make the ice cream and accessories pop. You can simply do this by right clicking the object and selecting a favorite material. Those choices are lambert which gives off no shine or reflection, blinn which gives off some reflection and shine and then phong which gives off tons of shine and reflection, mainly used for metals. With the ice cream I used blinn and for the waffle cone I used lambert, and lastly for the metals I used phong. After adding the material, you can add a texture so that it shines as well. To finish the shapes off, I added a nice carpet to put in more detail.


     The last step of the project was to add directional light to make the shadows reveal themselves and add lighting to make the objects less dull. The types of directional light used was key light, and back lighting.

What I Learned:

    
     The overall project went well and was a success for me. It taught me a lot more about Maya, as any other project would usually do. This showed me how to add bump mapping to textures and better lighting.

More shots of ice cream:


The Taj Mahal (Not really)- Animation

Structure of Castle


 Recently, I've been working on a castle using the program Maya which is a very used program in todays animation businesses. For this castle, the main shapes needed to start it off was mainly polygons including rectangles, cubes, planes and cylinders. With those basic shapes, you can make a simple castle. If you have more time on your hands, you can make your castle more complex, I added a flag, water, mountains, scenery, and a planet that is shown in the next photo. I also added texture to make the castle pop out.

Castle Building process:

    
Wide shot image of finished castle.
     When building this castle, we were given a few instructions to follow in order to get a castle out of random shapes. Firstly I placed a place to be the castles support, just like a normal house on concrete for its support. Then I used two cylinders and duplicated them into two more for the four main corners of the castle. Next I used four rectangular prisms to form the four walls connecting to the cylinder shapes. Then using the extrude tool, you extruded the tops of the walls by adding subdivisions and selecting the faces to extrude which allows you to drag up or down on the one selected part of the object. Lastly you create a door which was probably one of the hardest parts of the process for me. Using a thin cylinder and rectangular prism, you would union them together using the Booleans. the first time you used it to combine the two into a door shape and on the second time you cut the shape out of the wall. And there you have a door. There are the steps to creating a basic castle.


Extra Steps:


     Since I wanted to take my castle a little more further than just a regular old castle, I decided to add a unseamed stone texture to my castle to make it pop. I then used a sphere shape and cone shape and combined them together to create a dome shape to add to each of the cylinders on the corners of the castle. I then did the same thing for the cylinder in the middle but I scaled it to a larger size so it would fit the cylinder. I decided to add a marble texture to those domes, just because I thought it would add good contrast and good colors to make the castle look like royalty. I then added a wooden texture to the door. To finish the castle off, I added a nice red flag using a cone and scaling its sides to form a thinner triangle and attached it to a very thin cylinder. What's a castle without an alliance?


Extra Wide image of finished castle.
     Sometimes a castle can look boring just sitting there on a plane with no landscape or surroundings. I added a cone under the plane for the castle just to be creative and make it look as if it was on a floating island. Then I surrounded the castle with water by adding a plane and a water texture to the plane. Using the extrude tool, I was able to add interesting mountains to surround the castle and give it that barrier look to make the castle seem like it had protect and good defense. For the last object that sits on the floating island, I had to make rocks by getting several spheres and making dents in them with a push in tool and then I stacked them at the end of the water flow. Lastly I created a simple planet using a sphere and adding a planet texture to it. Finally I added a background to set the setting of the castle which of course is in space!

     Everything I used was polygons, as simple as that. After the creation of this castle, I was able to understand the basics of Maya and animation as well.


Marina & the Diamonds- Radioactive (Music Video)

First ever music video!

Brianna Correa lying down and singing with song.
Radioactive
     
      I chose to do a music video over the song Marina and the Diamonds- Radioactive. This was a long and first time process. My group that was involved in the music video includes Sky Tripp, and Brianna Correa, with a little extra help from Anthony.


Filming Process:

    
Brianna Correa and Anthony fighting between their relationship.
     The filming process for this video was very interesting. We had to preplan by setting up a story board which shows all of the shots you are going to take and use to make your story. We also had to use a beat sheet that we wrote on once we figured out our song. With group projects comes difficulties and with difficulties comes a solution that is needed. My groups main struggles were trying to agree upon a song and story. there was quite a bit of misunderstandings and communication issues but soon we got it resolved. That was not the only issue. After filming most of our shots, we lost our SD card which had all of our clips on it so we had to restart and soon we found the SD card and lost a lot of time which caused us to get behind big time. Me and my group had to come up with a plan, so Sky chose the song and then we all came up with a story together and could start filming. Some of the old clips were still put to use in the video. Our story is about a breakup between a girl character and a boy character and the girl must forget about it and move on. The girl character is played by Brianna Correa, the boy character is played by Anthony. After the filming was finished, we could then edit. During the edit, we added the music in and had to mark up each beat of the music so we could line the clips up with the beats. Overall I thought my edit was fine but I feel as if it could have had a better story line.


What I Learned:


*The responsibility that is needed when you work in groups, as well as the communication.

*How make simple music video using final cut pro

* Time management is a very important skill that is needed in all projects and something that I can learn to progress on as more projects are to come.

     I think me, Brianna and Sky all learned tons of lessons that we can use to enhance our next projects. I feel like I learned to not judge or disagree upon something until you actually know how well you like something. At first this song was a little iffy to me but as time flew by, it became acceptable to me.

Video link to Youtube:


Lego Star Wars Adventure! And Blood Drive Experience...(Documentaries)

First Live Documentaries

Lego Star Wars Adventure!

     
     You may be wondering, "What is the Lego Star Wars Adventure?" My answer is the Lego Star Wars adventure is a documentary over the building of a Star Wars ship, made from Legos. We built, filmed, recorded voice overs and lastly edited out the final product of the documentary. The people who filmed this project is Brianna Correa, Wyatt Fowler and Markus Pecerra. Then the filmed bits were handed off to each of us individually so we could then edit and create our own documentaries.

Screenshot of Star Wars Lego box, the illustration on the
front shows a visual of what is being built.

Building Process:

    
     After picking our groups for this project, each group was given a Lego Star Wars box that inside, contained many pieces of Legos. Their were two people in each group, one person would switch off every time so that each person got two turns to build the Lego ship. The ship we attempted to build was the Millennium Falcon. The building process took quite a bit of patience. But there was an advantage that provided the group with a much simpler building process. That was when our group got to use a handy dandy instructions manual. This showed us step by step how to build the Millennium Falcon. After each of us had completed the build of the ship at least two times, we then had to take apart our creation for the next class to use.
 

What was learned: (Editing process on Blood Drive)

Step by step manual that was used to help the groups build the
Millennium Falcon.
    
     The main thing I learned throughout this process was how to listen to audio throughout your recordings to make sure you are picking up your sounds from the interview. I also learned how to hold the camera steady and get different shots from different angles to provide a better suited documentary. Finally I was able to figure out that asking interesting question and having the interviewed person answer in complete sentences is important. This is so the audience watching can comprehend what is being ask and it makes a documentary flow.

Things to pull from experience & do differently:


*Firstly, I would have asked better questions and more serious questions so that I could provide the audience with a better perspective on the video.

*Secondly, I would have had the people being interviewed speak up louder and respond to the questions in complete sentences so that there could be more to talk about in the video when editing.

     There are things that I can both learn from and use to enhance my next experience when I decide to make a documentary again. I hope this provided you viewers with an understanding of how one of my first documentaries went.


Finished product of Lego Documentary:


Link to video above on Youtube:

 https://www.youtube.com/watch?v=GWXbH6kV4p8&list=UUM0wnvFn5VK2G9dQ2SVn5Vg


Blood Drive Experience...


Clayton Daugherty about to get his blood drawn.
     On November 14th, me and Brianna Correa filmed the Olathe Northwest annual blood drive. This was a tricky task because it required going in and finding a blood donor who wouldn't mind sharing their experiences from the past and allowing us to view them through their blood donating process. After getting the film we needed, we then made voice overs to describe the process of the video.

Whole Process:


Picture of Clayton Daugherty from our interview with him.
     During Olathe Northwest's annual blood drive, we found a person who was comfortable sharing his blood donating experience and allowing us to film him on his adventure. The person we interviewed was Clayton Daugherty, a junior who had never donated blood before. First he had to get his ID checked and was asked questions to make sure that he was eligible to donate. After that, he was taken into a waiting room while he waited for a nurse to come get him so they could start the blood drawing experience. This was a tricky part for me and Brianna because there was so little room for anyone and one of us had to be kicked out. Another flaw was we could not get and filming of blood being drawn from the donors arms. After the blood was drawn, the donors were provided with iron rich snacks to help the donors maintain healthy iron levels. We were very lucky that Clayton had good iron levels because most people were not eligible to donate because a flaw went on or their iron levels were too low or too high or some just happened to pass out halfway through the process. At the end, donors could then sign a blood donor card to show that they donated.


What was Learned:

    
     During this process, we became more aware of what was suppose to be happening and what wasn't. When filming, it was important to give other people space and it was important to capture the films you wanted to get because you couldn't really redo it. This required get down in uncomfortable positions in order to capture you're shot. After the filming, we learned how to edit a documentary as one should be. This editing process required a ton of voiceovers that over lapped videos to make it an actual voice over. Before making voice overs, we had to create scripts and mark the videos we really wanted to use during the documentary and write down all of the sound being heard or said in the videos. After that, I created my voiceovers that I wanted to use and say during the documentary.When the script for the voiceovers was ready to be recorded, we went into our studio and recorded our voiceovers then edited. The editing required pulling a lot of sound bytes so the interview or the voice over could be heard. When the editing was done with, I then replayed the video to make sure everything was adjusted right and was ready to be watched by others.


Things to pull from experience:


*It is important to be ready at all times when filming a documentary. You want to capture all of the action that happens so you don't miss out when recording the live action.

*Always get uncomfortable and get the footage you want.

      I personally don't think this footage could have gotten any better. Me and Brianna were provided with a great blood donor that made our task much simpler.


Link to finished product of Blood Drive documentary: